Contents:
- 2.1: Setting Up the Equipment Maintenance
Module
- 2.1.1: Equipment Names
- 2.1.2: Equipment Classifications
- 2.1.3: Maintenance Types
- 2.1.4: Materials for Equipment
Maintenance
- 2.1.5: Replacement Parts for Equipment
Maintenance
- 2.1.6: Equipment Maintenance Operations
- 2.1.7: Equipment Maintenance Profiles
2.1 Setting Up the Equipment Maintenance Module
|
|
Before you start using the equipment maintenance module in
EZM Web to track and control maintenance for your equipment, you must set it
up. To start setting up the equipment
maintenance module, click on Setup under the Equipment Maintenance drop-down
list on the left side of the screen:
![]()
Fig. 2.1 – Setup Link
After you click on Setup, you will be taken to the
following screen, which we’ll call the “equipment maintenance module setup
screen”:

Fig. 2.2 – Equipment maintenance module setup screen showing
multiple tabs along the top
In this section of EZM Web, you set up the equipment
maintenance module. Notice that at the
top part of the screen there are several tabs: Equipment Name, Classification,
Maintenance Type, Materials, Parts, Operations, and
Profiles:
![]()
Fig. 2.3 – Tabs showing sections of equipment maintenance
module setup
These
tabs represent different areas of the equipment maintenance module setup. Clicking on each tab will bring you to the
corresponding area of the setup section.
Here is a brief description of each of the areas:
o
Equipment Name: Here
you enter names / short descriptions of types of equipment that you enter into
EZM Web. Every time you enter a piece
of equipment into EZM Web, you assign it one of the equipment names you have
entered here. This is to help you
identify, at a glance, what the various types of equipment you have entered
into EZM Web.
o
Classification: EZM Web
also lets you assign pieces of equipment different equipment
classifications. This allows you to group
related pieces of equipment together, all sharing the same classification, for
maintenance tracking purposes. Clicking
on the Classification tab takes you to a section of EZM Web where you
enter the names of the equipment classifications you want to create.
o
Maintenance Type: This is
where you enter names / short descriptions of maintenance events that you
schedule for your equipment in EZM Web.
Every periodic or emergency maintenance event that you create in EZM Web
is assigned one of the names that you enter here.
o
Materials: This is where you enter
the materials that you use in your equipment maintenance.
o
Parts: This is where you enter the
replacement parts that you use in your equipment maintenance.
o
Operations: In EZM Web, each
maintenance event that you schedule for a piece of equipment breaks down into
individual operations. Each of these
operations must have a name chosen from a list you enter into the section of
EZM Web accessed by clicking on the Operations tab.
o
Profiles: In EZM Web, a Maintenance
Profile is a complete description of a maintenance schedule. By clicking on the Profiles tab, you
are taken to a section of EZM Web where you can create new or edit Maintenance
Profiles. Thus, whenever you input a
new piece of equipment into EZM Web, you must select one of the maintenance profiles
you’ve created. This is advantageous
because you need not input every detail of the maintenance schedule for every
piece of equipment you enter, but rather just select the maintenance profile
that contains the maintenance you want to have performed for that
equipment. This saves a lot of time
when entering several pieces of equipment which all have the same maintenance
requirements.
All of
the sections mentioned above are explained in depth in the following sections.
2.1.1
Equipment Names
As
mentioned in section 2.1 Setting Up the Equipment Maintenance Module,
the equipment maintenance module setup section of EZM Web includes a section
where you enter Equipment Names, which are names / short descriptions of types
of equipment that you enter into EZM Web.
Every time you enter a piece of equipment into EZM Web, you assign it
one of the equipment names you have entered.
This is to help you identify, at a glance, what the various types of
equipment you have entered into the EZM Web are.
To get to
the section of EZM Web where you enter Equipment Names, first you need to go to
the equipment maintenance module setup screen. Click on the Equipment Name
tab (the leftmost tab) at the top of the screen:
![]()
Fig 2.4 - Equipment Name tab
Doing this will take you to the section of the equipment
module setup where you can enter the Equipment Names:
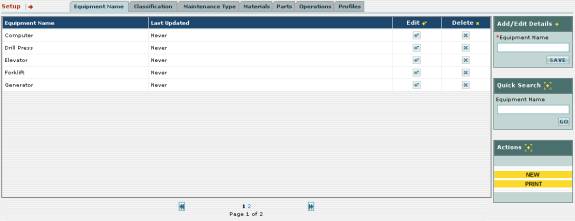
Fig 2.5 – Section of equipment maintenance module setup
for equipment names
All of the equipment names you have already entered will
be listed in this screen:

Fig 2.6 – List of all equipment names
In this section of EZM Web, you can:
o
Enter new equipment names
o
Edit an existing equipment name
o
Delete an equipment name
o
Print a report showing all of the equipment names you’ve
entered
Entering a New Equipment Name
To enter a new equipment name, first locate the
yellow-colored NEW button at the bottom right part of the screen:

Fig 2.7 – “NEW” button for entering a new equipment name
Click on
the NEW button to enter a new equipment name. Notice that the Add / Edit Details box in the upper right
part of the screen contains a box called Equipment Name that turns a
salmon color after you’ve clicked on the NEW button:
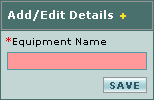
Fig 2.8 – “Add / Edit Details” box where you enter a new
equipment name
Next, click in the salmon-colored box and type the new
equipment name. Then click on the SAVE
button. The new equipment name which
you typed will appear in the list.
Editing an Existing Equipment Name
To edit an existing equipment name, first locate the
equipment name in the list and then look to the right of it until you encounter
a ![]() button under the Edit column:
button under the Edit column:

Fig 2.9 – “Edit” column with edit buttons
Click on the ![]() button. Notice that the Add
/ Edit Details box contains a box called Equipment Name turns a
salmon color after you’ve clicked on the NEW button and fills in with
the equipment name you want to edit (which in the case of fig. 2.10 is
“computer”):
button. Notice that the Add
/ Edit Details box contains a box called Equipment Name turns a
salmon color after you’ve clicked on the NEW button and fills in with
the equipment name you want to edit (which in the case of fig. 2.10 is
“computer”):
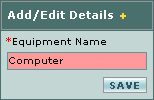
Fig 2.10 - “Add / Edit Details” box; editing an equipment
name
Click in the salmon-colored box and type to make the
desired changes to the equipment name.
Then click on the SAVE button.
The updated equipment name will be shown in the list.
Deleting an Equipment
Name
To delete an existing equipment name, first locate the equipment
name in the list and then look to the right of it until you encounter a ![]() button under the Delete column:
button under the Delete column:

Fig 2.11 – “Delete” column with delete buttons
Click on
the ![]() button. The equipment
name to the left of the delete button you clicked will be deleted from the
list.
button. The equipment
name to the left of the delete button you clicked will be deleted from the
list.
Printing a List of All Equipment Names
To print
a list of all equipment names entered into EZM Web so far, first locate the
yellow-colored PRINT button at the bottom right part of the screen:
Fig 2.12 – “PRINT” button for printing the list of
equipment names
Clicking on the PRINT button will print the
following report:
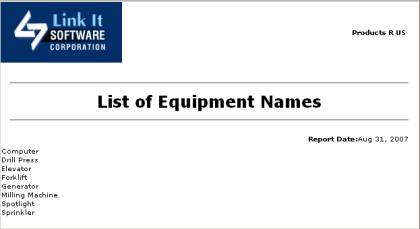
Fig 2.13 – Report showing list of all equipment names
2.1.2 Equipment Classifications
As
mentioned in section 2.1 Setting Up the
Equipment Maintenance Module, the equipment maintenance module setup
section of EZM Web includes a section where you enter Equipment
Classifications, which are names of groups which you can assign different
pieces of equipment to for maintenance tracking purposes. Every time you enter a piece of equipment
into EZM Web, you assign it one of the Classification names you have
entered.
To get to
the section of EZM Web where you enter Equipment Classifications, first you
need to go to the equipment maintenance module setup screen
Click on the Classification tab at the top of the screen:
![]()
Fig 2.14 - Classification tab
Doing this will take you to the section of the equipment
module setup where you can enter the Equipment classifications:
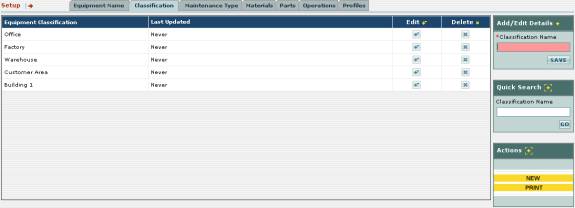
Fig 2.15 – Section of equipment maintenance module setup
for equipment classifications
All of the Equipment classifications you have already
entered will be listed in this screen:

Fig 2.16 – List of all equipment classifications
In this section of EZM Web, you can:
o
Enter new equipment classifications
o
Edit an existing equipment classification
o
Delete an equipment classification
o
Print a report showing all of the equipment
classifications you’ve entered
Entering a New Equipment Classification
To enter a new equipment classification, first locate the
yellow-colored NEW button at the bottom right part of the screen:
Fig 2.17 – “NEW” button for entering a new equipment name
Click on
the NEW button to enter a new classification. Notice that the Add / Edit Details box in the upper right
part of the screen contains a box called Classification Name that turns
a salmon color after you’ve clicked on the NEW button:
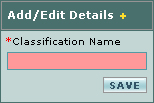
Fig 2.18 – “Add / Edit Details” box where you enter a new
classification
Next, click in the salmon-colored box and type the new
classification. Then click on the SAVE
button. The new classification which
you typed will appear in the list.
Editing an Existing Equipment
Classification
To edit an existing equipment classification, first locate
the classification in the list and then look to the right of it until you
encounter a ![]() button under the Edit column:
button under the Edit column:
Fig 2.19 – “Edit” column with edit buttons
Click on the ![]() button. Notice that the Add
/ Edit Details box contains a box called Classification turns a
salmon color after you’ve clicked on the NEW button and fills in with
the classification you want to edit (which in the case of fig. 2.20 is
“Office”):
button. Notice that the Add
/ Edit Details box contains a box called Classification turns a
salmon color after you’ve clicked on the NEW button and fills in with
the classification you want to edit (which in the case of fig. 2.20 is
“Office”):

Fig 2.20 - “Add / Edit Details” box; editing an equipment
name
Click in the salmon-colored box and type to make the
desired changes to the classification.
Then click on the SAVE button.
The updated classification will be shown in the list.
Deleting an Equipment Classification
To delete an existing classification, first locate the
classification in the list and then look to the right of it until you encounter
a ![]() button under the Delete column:
button under the Delete column:
Fig 2.21 – “Delete” column with delete buttons
Click on
the ![]() button. The
classification to the left of the delete button you clicked will be deleted
from the list.
button. The
classification to the left of the delete button you clicked will be deleted
from the list.
Printing a List of All Equipment Classifications
To print
a list of all equipment classifications entered into EZM Web so far, first
locate the yellow-colored PRINT button at the bottom right part of the
screen:
Fig 2.23 – “PRINT” button for printing the list of
equipment classifications
Clicking on the PRINT button will print the following
report:
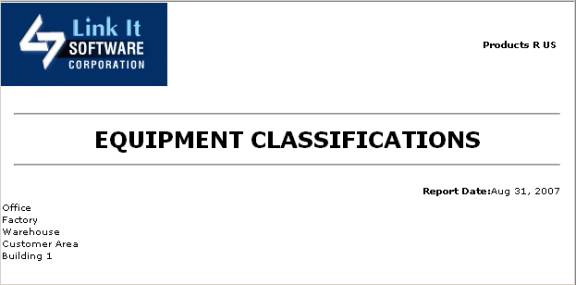
Fig 2.24 – Report showing list of all equipment
classifications
2.1.3 Maintenance Types
As
mentioned in section 2.1 Setting Up the
Equipment Maintenance Module, the equipment maintenance module setup
section of EZM Web includes a section where you enter Maintenance Types, which
are names / short descriptions of maintenance events that you schedule for your
equipment in EZM Web. Every periodic or
emergency maintenance event that you create in EZM Web is assigned one of the
names that you enter here.
To get to
the section of EZM Web where you enter Maintenance Types, first you need to go
to the equipment maintenance module setup screen (see section 2.1 Setting Up the Equipment Maintenance
Module for how to get here).
Click on the Maintenance Type tab at the top of the screen:
![]()
Fig 2.25 – Maintenance Type tab
Doing
this will take you to the section of the equipment module setup where you can
enter the Maintenance Types:
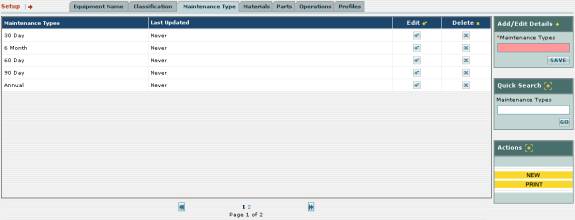
Fig 2.26 – Section of equipment maintenance module setup
for maintenance types
All of the maintenance types you have already entered will
be listed in this screen:

Fig 2.27 – List of maintenance types
In this section of EZM Web, you can:
o
Enter new maintenance types
o
Edit an existing maintenance type
o
Delete a maintenance type
o
Print a report showing all of the maintenance types you’ve
entered
Entering a New
Maintenance Type
To enter a new maintenance type, first locate the
yellow-colored NEW button at the bottom right part of the screen:
Fig 2.28 – “NEW” button for entering new maintenance types
Click on
the NEW button to enter a new maintenance type. Notice that the Add / Edit Details
box in the upper right part of the screen contains a box called Maintenance
Type that turns a salmon color after you’ve clicked on the NEW
button:
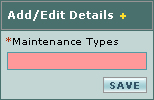
Fig 2.29 – “Add / Edit Details” box where you enter a new
maintenance type
Next, click in the salmon-colored box and type the new
maintenance type. Then click on the SAVE
button. The new maintenance type which
you typed will appear in the list.
Editing an Existing Maintenance Type
To edit an existing maintenance type, first locate the
maintenance type in the list and then look to the right of it until you
encounter a ![]() button under the Edit column:
button under the Edit column:
Fig 2.30 – “Edit” column with edit buttons
Click on the ![]() button. Notice that the Add
/ Edit Details box contains a box called Maintenance Type turns a
salmon color after you’ve clicked on the NEW button and fills in with
the maintenance type you want to edit (which in the case of fig. 2.31 is “30
Day”):
button. Notice that the Add
/ Edit Details box contains a box called Maintenance Type turns a
salmon color after you’ve clicked on the NEW button and fills in with
the maintenance type you want to edit (which in the case of fig. 2.31 is “30
Day”):
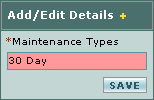
Fig 2.31 - “Add / Edit Details” box; editing a maintenance
type
Click in the salmon-colored box and type to make the
desired changes to the maintenance type.
Then click on the SAVE button.
The updated maintenance type will be shown in the list.
Deleting a Maintenance Type
To delete an existing maintenance type, first locate the
maintenance type in the list and then look to the right of it until you
encounter a ![]() button under the Delete column:
button under the Delete column:
Fig 2.32 – “Delete” column with delete buttons
Click on
the ![]() button. The maintenance
type to the left of the delete button you clicked will be deleted from the
list.
button. The maintenance
type to the left of the delete button you clicked will be deleted from the
list.
Printing a List of All Maintenance Types
To print
a list of all maintenance types entered into EZM Web so far, first locate the
yellow-colored PRINT button at the bottom right part of the screen:
Fig 2.33 – “PRINT” button for printing the list of
maintenance types
Clicking on the PRINT button will print the
following report:

Fig 2.34 – Report showing list of all maintenance types
2.1.4
Materials for Equipment Maintenance
As
mentioned in section 2.1 Setting Up the
Equipment Maintenance Module, the equipment maintenance module setup
section of EZM Web includes a section where you enter the materials that you
use in your equipment maintenance.
To get to
the section of EZM Web where you enter materials for equipment maintenance,
first you need to go to the equipment maintenance module setup screen (see
section 2.1 Setting Up the Equipment
Maintenance Module for how to get here). Click on the Materials tab at the top of the screen:
![]()
Fig 2.35 – Materials tab
Doing
this will take you to the section of the equipment module setup where you can
enter the materials you will be using in equipment maintenance:
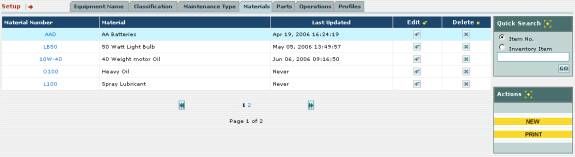
Fig 2.36 – Section of equipment maintenance module setup
for equipment maintenance materials
In the
screen shown in fig. 2.36, you will see all of the materials for equipment
maintenance which you have entered into EZM Web so far:

Fig 2.37 – List of materials for equipment maintenance
This list not only includes items you’ve entered here, but
also inventory items you’ve entered into EZM Web through the Inventory module
which you’ve designated as being materials used in equipment maintenance. (See section 4.1.2 Inputting Your Inventory Items
for additional information on inputting items through the Inventory module).
In this section of EZM Web, you can:
o
Enter new materials for equipment maintenance
o
Edit existing materials
o
Delete materials
o
Print a report showing all of the materials for equipment
maintenance you’ve entered
Entering a New Material
To enter a new material, first locate the yellow-colored NEW
button at the bottom right part of the screen:
Fig 2.38 – “NEW” button for entering a new material
After clicking on the NEW button, a screen will open where you can enter the details
about the new material:
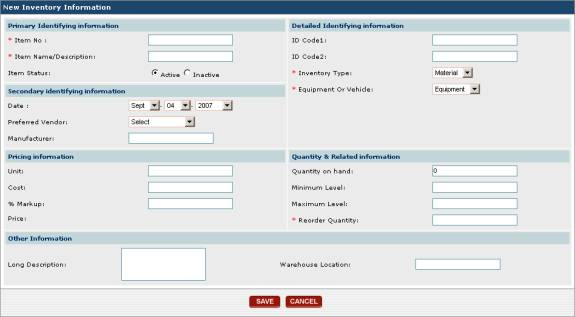
Fig 2.39 – Screen for entering information about new
material
Notice that Inventory Type and Equipment or
Vehicle have been automatically given the values “Material” and “Equipment”
respectively to indicate that the new inventory item you are entering is a
material used in equipment maintenance.
You can change these values, but, if you do, the item you enter will not
appear in the list of materials for equipment maintenance as seen in figs. 2.36
and 2.37 or be available for inclusion in equipment maintenance.
For detailed information on the purpose of each data entry
field in this screen, please consult section 4.1.2 Entering Your Inventory Items.
When you have finished entering all of the information in
this screen, click on the SAVE button to enter the new material into EZM
Web. If you have changed your mind and
no longer want to enter the new material, click on the CANCEL button to
return to the list of materials without entering anything. The SAVE and CANCEL buttons
are at the bottom of the screen:
![]()
Fig 2.40 – Close-up of fig. 2.39 showing “SAVE” and
“CANCEL” buttons
Editing an Existing
Material
To edit an existing material, first locate the material in
the list of materials for equipment maintenance (as shown in figs. 2.36 and
2.37) and then look to the right of it until you encounter a ![]() button under the Edit column:
button under the Edit column:
Fig 2.41 – “Edit” column with edit buttons
Clicking on the ![]() button will bring up the following screen where you can edit the
material:
button will bring up the following screen where you can edit the
material:
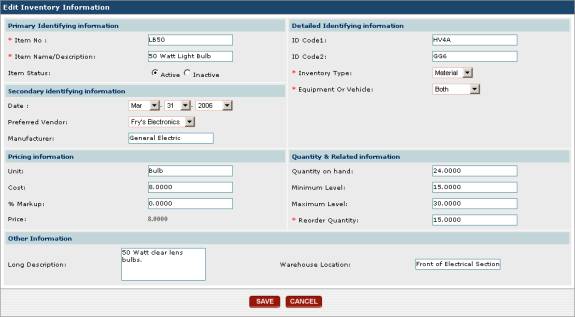
Fig 2.42 – Screen for entering information about new
material
This
screen is similar to the one where you enter a new material (see fig.
2.39). However, notice that all of the
existing information for the material you are editing is filled in the data
fields. You may change any of the data
fields in this screen.
For
detailed information on the purpose of each data entry field in this screen,
please consult section 4.1.2 Entering
Your Inventory Items.
When you
have finished making all of your desired changes, click on the SAVE
button to save the changes to the material.
If you have changed your mind and no longer want to make any changes,
click on the CANCEL button to return to the list of materials without
changing anything. The SAVE and CANCEL
buttons are at the bottom of the screen:
![]()
Fig 2.43 – Close-up of fig. 2.39 showing “SAVE” and
“CANCEL” buttons
Deleting a Material
To edit an existing material, first locate the maintenance
type in the list and then look to the right of it until you encounter a ![]() button under the Delete column:
button under the Delete column:
Fig 2.44 – “Delete” column with delete buttons
Click on
the ![]() button. The material to
the left of the delete button you clicked will be deleted from the list.
button. The material to
the left of the delete button you clicked will be deleted from the list.
Printing a List of Materials Used in Equipment
Maintenance
To print
a list of all materials for equipment maintenance entered into EZM Web so far,
first locate the yellow-colored PRINT button at the bottom right part of
the screen:
Fig 2.45 – “PRINT” button for printing list of materials
Clicking
on the PRINT button will print the following report:
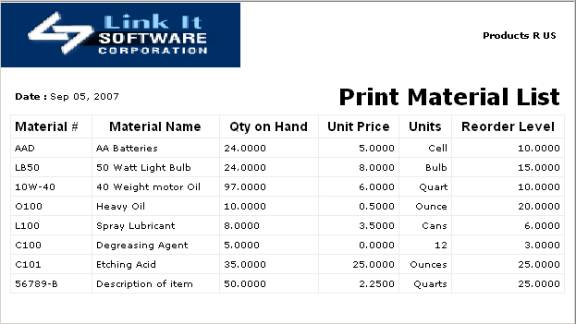
Fig 2.46 – Report showing list of all materials used in
equipment maintenance
2.1.5
Replacement Parts for Equipment Maintenance
As
mentioned in section 2.1 Setting Up the
Equipment Maintenance Module, the equipment maintenance module setup
section of EZM Web includes a section where you enter
the replacement parts that you use in your equipment maintenance. Replacement parts are items you include in
your maintenance events which need to be replaced in the event that there is a
part failure or that part fails an inspection.
To get to the section of EZM Web where you
enter replacement parts for equipment maintenance, first you need to go to
the equipment maintenance module setup screen (see section 2.1 Setting Up the Equipment Maintenance Module
for how to get here). Click on the Parts
tab at the top of the screen:
![]()
Fig 2.46 – Parts tab
Doing
this will take you to the section of the equipment module setup where you can
enter the replacement parts you will be using in equipment maintenance:
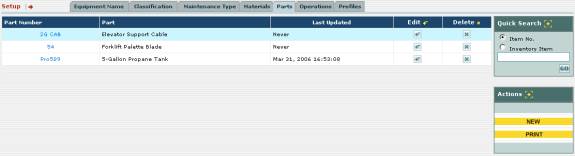
Fig 2.47 – Section of equipment maintenance module setup
for equipment maintenance replacement parts
In the
screen shown in fig. 2.46, you will see all of the replacement parts for
equipment maintenance which you have entered into EZM Web so far:

Fig 2.48 – List of replacement parts for equipment
maintenance
This list not only includes items you’ve entered here, but
also inventory items you’ve entered into the EZM Web through the Inventory
module which you’ve designated as being replacement parts used in equipment
maintenance. (See section 4.1.2 Inputting Your Inventory Items
for additional information on inputting items through the Inventory module).
In this section of the EZM Web, you can:
o
Enter new replacement parts for equipment maintenance
o
Edit existing replacement parts
o
Delete replacement parts
o
Print a report showing all of the replacement parts for
equipment maintenance you’ve entered
Entering a New Replacement Part
To enter a new replacement part, first locate the
yellow-colored NEW button at the bottom right part of the screen:
Fig 2.49 – “NEW” button for entering a new material
After clicking on the NEW button, a screen will open where you can enter the details
about the new replacement part:
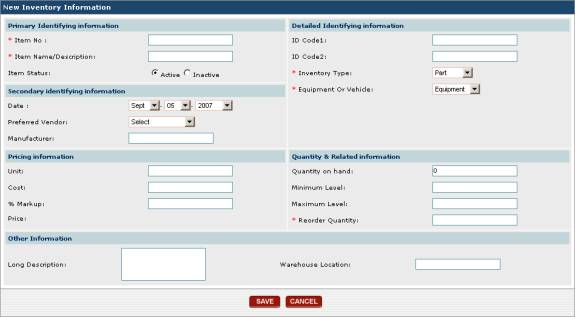
Fig 2.50 – Screen for entering information about new
replacement part
Notice that Inventory Type and Equipment or
Vehicle have been automatically given the values “Part” and “Equipment”
respectively to indicate that the new inventory item you are entering is a
replacement part used in equipment maintenance. You can change these values, but, if you do, the item you enter
will not appear in the list of replacement parts for equipment maintenance or
be available for inclusion in equipment maintenance.
For detailed information on the purpose of each data entry
field in this screen, please consult section 4.1.2 Entering Your Inventory Items.
When you have finished entering all of the information in
this screen, click on the SAVE button to enter the new replacement part
into EZM Web. If you have changed your
mind and no longer want to enter the new replacement part, click on the CANCEL
button to return to the list of parts without entering anything. The SAVE and CANCEL buttons
are at the bottom of the screen:
![]()
Fig 2.51 – Close-up of fig. 2.49 showing “SAVE” and
“CANCEL” buttons
Editing an Existing
Replacement Part
To edit an existing replacement part, first locate the
part in the list of replacement parts for equipment maintenance (as shown in
figs. 2.36 and 2.37) and then look to the right of it until you encounter
a ![]() button under the Edit column:
button under the Edit column:
Fig 2.52 – “Edit” column with edit buttons
Clicking on the ![]() button will bring up the following screen where you can edit the
replacement part:
button will bring up the following screen where you can edit the
replacement part:
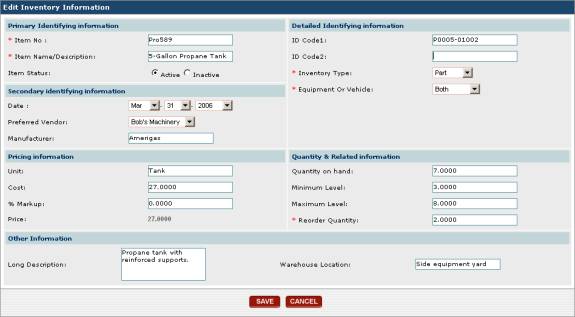
Fig 2.53 – Screen for entering information about new
material
This
screen is similar to the one where you enter a new replacement part (see fig.
2.39). However, notice that all of the
existing information for the part you are editing is filled in the data
fields. You may change any of the data
fields in this screen.
For
detailed information on the purpose of each data entry field in this screen,
please consult section 4.1.2 Entering
Your Inventory Items.
When you
have finished making all of your desired changes, click on the SAVE
button to save the changes to the part.
If you have changed your mind and no longer want to make any changes,
click on the CANCEL button to return to the list of replacement parts
without changing anything. The SAVE
and CANCEL buttons are at the bottom of the screen:
![]()
Fig 2.54 – Close-up of fig. 2.39 showing “SAVE” and
“CANCEL” buttons
Deleting a Replacement Part
To edit an existing replacement part, first locate the
maintenance type in the list and then look to the right of it until you
encounter a ![]() button under the Delete column:
button under the Delete column:
Fig 2.55 – “Delete” column with delete buttons
Click on
the ![]() button. The replacement
part to the left of the delete button you clicked will be deleted from the
list.
button. The replacement
part to the left of the delete button you clicked will be deleted from the
list.
Printing a List of Replacement Parts Used in
Equipment Maintenance
To print
a list of all replacement parts used in equipment maintenance entered into EZM
Web so far, first locate the yellow-colored PRINT button at the bottom
right part of the screen:
Fig 2.56 – “PRINT” button for printing list of replacement
parts
Clicking
on the PRINT button will print the following report:
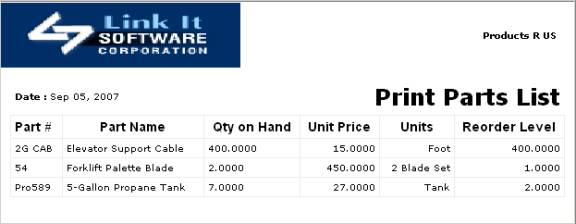
Fig 2.57 – Report showing list of all replacement parts
used in equipment maintenance
2.1.6 Equipment Maintenance Operations
As
mentioned in section 2.1 Setting Up the
Equipment Maintenance Module, the equipment maintenance module setup
section of EZM Web includes a section where you enter the operations that you
perform in equipment maintenance. In
EZM Web, each maintenance event that you schedule for a piece of equipment
breaks down into individual operations.
Each of these operations must be chosen from a list you enter into this
section of EZM Web.
To get to
the section of EZM Web where you enter Operations, first you need to go to the
equipment maintenance module setup screen (see section 2.1 Setting Up the Equipment Maintenance
Module for how to get here).
Click on the Operations tab at the top of the screen:
![]()
Fig 2.58 – Operations tab
Doing
this will take you to the section of the equipment module setup where you can
enter the operations:
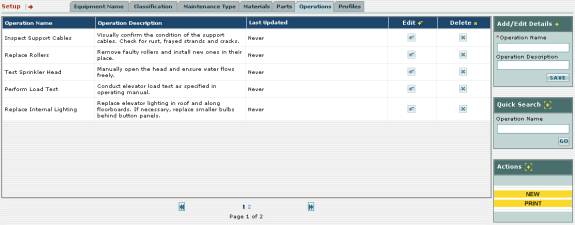
Fig 2.59 – Section of equipment maintenance module setup
for operations
All of the operations you have already entered will be
listed in this screen:
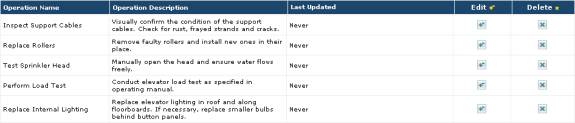
Fig 2.60 – Detail of fig. 2.59 showing list of operations
As you can see, each operation is listed with its name and
a detailed description of what is done to accomplish each operation.
In this section of the EZM Web, you can:
o
Enter new operations
o
Edit existing operations
o
Delete operations
o
Print a report showing all of the operations you’ve
entered
Entering a New Operation
To enter a new operation, first locate the yellow-colored NEW
button at the bottom right part of the screen:
Fig 2.61 – “NEW” button for entering new operations
Click on
the NEW button to enter a new operation. Notice that the Add / Edit Details box in the upper right
part of the screen contains a box called Operation Name that turns a
salmon color after you’ve clicked on the NEW button:
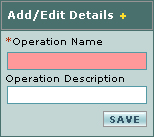
Fig 2.62 – “Add / Edit Details” box where you enter a new
operation
Click in the Operation Name box and type in the
name of the operation. The name of the
operation should be a short identifying name such as “Inspect Ceiling
Lights”. In addition to entering the
name of the operation, you must also enter a detailed description of the
operation. After you’ve entered the Operation
Name, then click in the Operation Description field just below (also
shown in fig. 2.62) and type in the operation description.
After you’ve entered the name and description of the
operation, then click on the SAVE button. The new operation will appear in the list.
Editing an Existing
Operation
To edit an existing operation, first locate operation in
the list and then look to the right of it until you encounter a ![]() button under the Edit column:
button under the Edit column:
Fig 2.63 – “Edit” column with edit buttons
Click on the ![]() button. Notice that the Add
/ Edit Details box contains a box called Operation Name that turns a
salmon color after you’ve clicked on the
button. Notice that the Add
/ Edit Details box contains a box called Operation Name that turns a
salmon color after you’ve clicked on the
![]() button and fills in with the name of the operation you want to
edit (which in the case of fig. 2.64 is “Inspect Support Cables”):
button and fills in with the name of the operation you want to
edit (which in the case of fig. 2.64 is “Inspect Support Cables”):
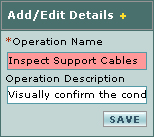
Fig 2.64 - “Add / Edit Details” box; editing a maintenance
type
Click in the salmon-colored box and type to make the
desired changes to the name of the operation.
You can also edit the description of the operation by clicking in the Operation
Description field and typing to make your changes. When you have finished making your changes
to the operation name and description, then click on the SAVE
button. The updated maintenance type
will be shown in the list.
Deleting an Operation
To delete an existing operation, first locate the
operation in the list and then look to the right of it until you encounter
a ![]() button under the Delete column:
button under the Delete column:
Fig 2.65 – “Delete” column with delete buttons
Click on
the ![]() button. The operation to the left of the delete
button you clicked will be deleted from the list.
button. The operation to the left of the delete
button you clicked will be deleted from the list.
Printing a List of All Operations
To print
a list of all operations entered into EZM Web so far, first locate the
yellow-colored PRINT button at the bottom right part of the screen:
Fig 2.66 – “PRINT” button for printing the list of
maintenance types
Clicking on the PRINT button will print the
following report:
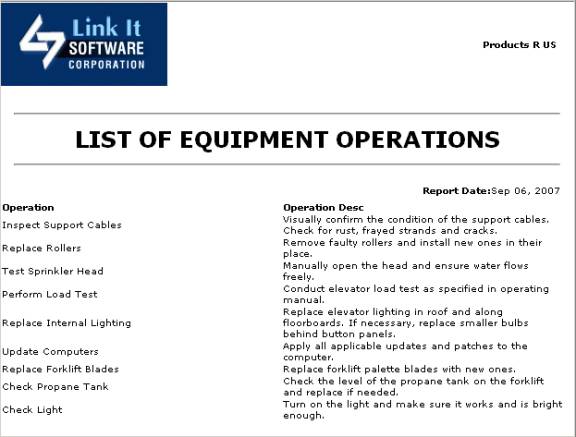
Fig 2.67 – Report showing list of all operations
2.1.7
Equipment Maintenance Profiles
As mentioned
in section 2.1 Setting Up the
Equipment Maintenance Module, the equipment maintenance module setup
section of EZM Web includes a section where you enter maintenance profiles.
Maintenance
profiles are an important part of EZM Web.
A maintenance profile is a complete description of the maintenance for a
piece of equipment. However, a
maintenance profile is not meant for one specific concrete piece of equipment
per se. Rather, it is meant for one or
more pieces of equipment all sharing the same maintenance requirements. The power of maintenance profiles in EZM Web
comes from the fact that when you enter several pieces of equipment into EZM
Web that all have the same maintenance requirements, you only have to apply the
same maintenance profile to each of them when entering them into EZM Web
instead of having to manually enter those maintenance requirements over and
over again for each one.
Each time
you enter a new piece of equipment into EZM Web, you must select the
maintenance profile that contains a description of the maintenance for that
piece of equipment. Therefore, before
you enter any pieces of equipment into EZM Web, you must create at least one
maintenance profile.
As
mentioned before, each maintenance profile is a complete description of the
maintenance requirements for a piece of equipment. A maintenance profile can be decomposed into one or more
maintenance types, which are maintenance actions that are performed
periodically. Furthermore, each
maintenance type can be broken down into the specific steps or operations
needed to complete the maintenance, the materials that are performed in the
maintenance, and the replacement parts that might be needed.
A
graphical representation of the structure of a maintenance profile is shown
below in fig. 2.68:
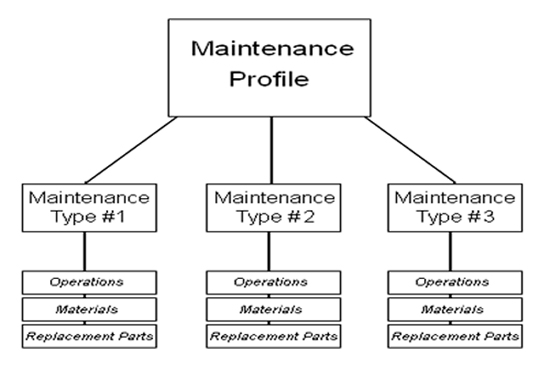
Fig 2.68 – Graphical representation of the structure of a
maintenance profile
To get to
the section of EZM Web where you enter materials for equipment maintenance,
first you need to go to the equipment maintenance module setup screen (see
section 2.1 Setting Up the Equipment
Maintenance Module for how to get here). Click on the Profiles tab at the top of the screen:
![]()
Fig 2.69 – Profiles Tab
Clicking
on the Profiles tab will take you to the screen where you can enter
equipment maintenance profiles into EZM Web:
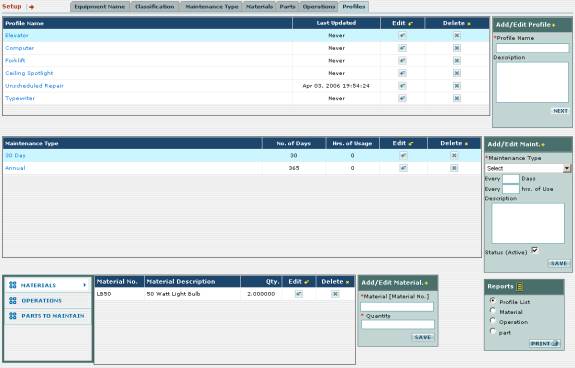
Fig 2.69 – Screen for entering equipment maintenance
profiles into EZM Web
The list
of maintenance profiles which you’ve entered so far is at the top of the
screen:

Fig 2.70 – List of equipment maintenance profiles in EZM
Web
In this
section of the manual, we will describe:
o
How to create a maintenance profile
o
How to add additional maintenance types to a profile
o
How to specify the specific steps to take to complete a
maintenance type (called “operations”)
o
How to specify the materials used in a maintenance type
o
How to specify the replacement parts that might be needed
in maintenance type
o
How to edit maintenance profiles
o
How to print a list of maintenance profiles you’ve entered
into EZM Web
Creating a New Maintenance Profile
To start
creating a new maintenance profile, first look to the upper right part of the
screen for an Add/Edit Profile box:
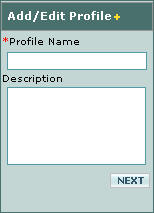
Fig 2.71 – “Add/Edit Profile” box with “Profile Name” and
“Description” fields
First click in the Profile Name field and type in
the name you wish to refer to this profile throughout EZM Web. You can also click in the Description field
and enter a description of the maintenance that this profile will specify,
although this is optional, and you may leave this field blank if you wish. After you have entered the Profile Name
and (optionally) Description, then click on the NEXT button below
the two fields.
After clicking on the NEXT button, a window will
pop up in the middle of the screen reminding you that creating a maintenance
profile is a 2-step process: the second step is adding at least one maintenance
type to the profile to create it. Click
on the OK button in the pop-up window:
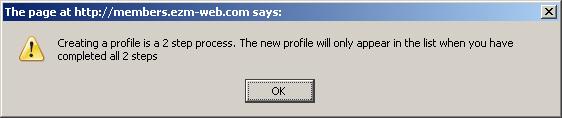
Fig 2.72 – Pop-up window notifying user that creating a
profile is a 2-step process
After the pop-up window closes, you will notice that the Add/Edit
Profile box in the upper right part of the screen has been replaced with an
Add/Edit Maint. box:
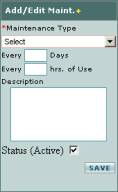
Fig 2.73 – “Add/Edit Maint.” box for adding a maintenance
type to a profile
The Add/Edit Maint. box is where you enter the one
maintenance type you need to create the maintenance profile, since every
maintenance profile needs at least one maintenance type. The first thing you should do is select the
name of the maintenance type you are adding to the maintenance profile by
selecting from the Maintenance Type drop-down box at the top of the Add/Edit
Maint. box. You will only be able
to select from maintenance type names that you have already entered into EZM
Web. For information on how to enter
these maintenance type names, see section 2.1.3 Maintenance Types.
Next, you’ll need to enter the frequency at which the
maintenance type you are entering occurs (see fig 2.74). If you enter the frequency both in days and
logged hours of usage, the maintenance will become due when whichever of the
two comes first.
![]()
Fig 2.74 – Fields where scheduling information for a
maintenance type is entered
Lastly,
you can enter a description of the maintenance type in the Description
field, although this is optional.
Once you
have entered the name for the maintenance type, the frequency at which the
maintenance takes place, and (optionally) the description, click on the SAVE
button at the lower right hand corner of the Add/Edit Maint. box. The equipment maintenance profile will have
been created: you will see the maintenance profile appear in the list of
profiles, and it will have the one maintenance type you specified, which will
be shown to the left of the Add/Edit Maint. box:
![]()
Fig 2.75 – Single maintenance type shown after creation of
maintenance profile
Adding More Maintenance
Types to a Profile
To add more maintenance types to a profile, first look at
the list of maintenance profiles (see fig. 2.70) and find the maintenance
profile to which you want to add one or more additional maintenance types. Click on the name of the maintenance profile
to which you want to add more maintenance types to select it. The list of maintenance types in the profile
you selected will be shown below the list of equipment maintenance profiles:

Fig 2.76 – List of maintenance types for a selected
profile
Now, to add maintenance types to the profile, use the Add
/ Edit Maint. box to the right of the list of maintenance types (this is
shown in fig. 2.74). The first thing
you should do is select the name of the maintenance type you are adding to the
maintenance profile by selecting from the Maintenance Type drop-down box
at the top of the Add/Edit Maint. box.
You will only be able to select from maintenance type names that you
have already entered into EZM Web. For
information on how to enter these maintenance type names, see section 2.1.3 Maintenance Types.
Next, you’ll need to enter the frequency at which the
maintenance type you are entering occurs (see fig 2.74). If you enter the frequency both in days and
logged hours of usage, the maintenance will become due when whichever of the
two comes first. If you are not
scheduling by hours of usage and are only scheduling by number of days, then
you can enter “0” for the hours.
Lastly, you can enter a description of the maintenance
type in the Description field, although this is optional.
Once you have entered the name for the maintenance type,
the frequency at which the maintenance takes place, and (optionally) the
description, click on the SAVE button at the lower right hand corner of
the Add/Edit Maint. box. The new
maintenance type will be added to the maintenance profile and will be displayed
in the list of maintenance types.
Specifying the Steps to
Take to Complete a Maintenance Type
Every maintenance type you have in a maintenance profile
includes the steps to take to complete the maintenance type. These are referred to as the “operations”.
To do this, first select the maintenance type to which you
want to add an operation by clicking on it.
Then look in the lower left corner of the screen for a box that has
three options: MATERIALS, OPERATIONS, and PARTS TO MAINTAIN:
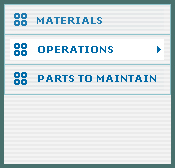
Fig 2.77 – Box with “MATERIALS”, “OPERATIONS”, and “PARTS
TO MAINTAIN” options
Click on OPERATIONS. Once you have clicked there, a list of all of the operations in
the maintenance type will display to the right (or will be empty if you haven’t
entered any operations yet):
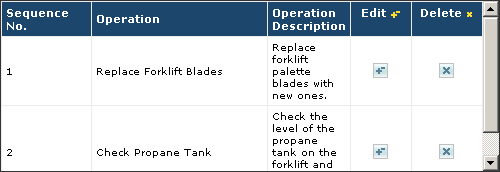
Fig 2.78 – List of operations
For each operation in the list, the sequence/step no. is
shown (Sequence No.), the operation name is shown (Operation),
and a detailed description of the operation (Operation Description).
To add a new operation, use the Add/Edit Operations
box to the right to add a new operation to the list:
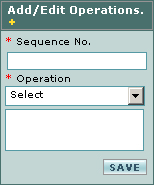
Fig 2.79 – “Add/Edit Operations” box used to add a new
operation to a maintenance type
First, enter the step no. of the operation: in other
words, if it’s the 1st, 2nd, 4th step,
etc. Do this by clicking in the Sequence
No. box and typing in a number.
Then select the operation you want to add from the Operation drop-down
box. Keep in mind that only the
operations you entered into EZM Web so far are available to be entered
here. (See section 2.1.6 Equipment Maintenance Operations for
how to enter equipment maintenance operations into EZM Web.)
Once you have entered the sequence number and selected the
operation, then click on the SAVE button to add the operation to the
maintenance type. You may add as many
operations as necessary to specify all of the steps needed to complete the
maintenance.
You can also edit an operation that you’ve already
entered: you can change the sequence number, the operation description, or the
operation itself. To do this, locate
the operation in the list which you want to edit and then look to the right of
it until you encounter a ![]() button under the Edit column. Once you click on the edit button, the information about the
operation you’re editing will appear in the Add/Edit Operations box:
button under the Edit column. Once you click on the edit button, the information about the
operation you’re editing will appear in the Add/Edit Operations box:
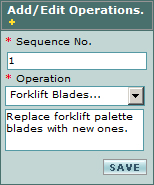
Fig 2.80 – Editing an operation in the “Add/Edit
Operations” box
In the Add/Edit Operations box, edit any of the
information you wish, and then click on the SAVE button. The operation will be updated with the new
information.
To delete a operation from the maintenance type, locate
the operation in the list and then look to the right of it until you encounter
a ![]() button under the Delete column. Click on the
button under the Delete column. Click on the ![]() button. The operation to
the left of the delete button you clicked will be deleted from the list.
button. The operation to
the left of the delete button you clicked will be deleted from the list.
Specifying the Materials
Used in the Maintenance
When you add materials to a maintenance type, those
materials will be used every time the maintenance is performed. In addition, the materials you add to the
maintenance type will automatically be deducted from your inventory every time
you complete a work order for that maintenance.
To begin adding materials to a maintenance type, first
look in the lower left corner of the screen for a box that has three options: MATERIALS,
OPERATIONS, and PARTS TO MAINTAIN:
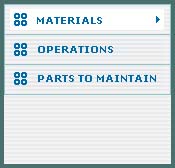
Fig 2.81 – Box with “MATERIALS”, “OPERATIONS”, and “PARTS
TO MAINTAIN” options
Click on MATERIALS. Once you have clicked there, a list of all of the materials in
the maintenance type will display to the right (or will be empty if you haven’t
entered any materials yet):
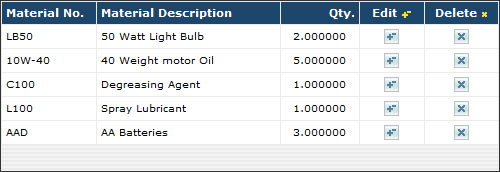
Fig 2.82 – List of materials
For each
material in the list, its unique identification number is shown (Material
No.), the material name is shown (Material Description), and the
quantity used in the maintenance is shown (Qty.).
To add a
new material, use the Add/Edit Material box to the right to add a
new material to the list:
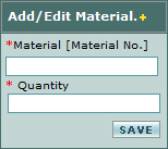
Fig 2.83 – “Add/Edit Material” box used to add a new
material to a maintenance type
First, enter the name of the material you want to add Do this by clicking in the Material box
and typing in the name. EZM Web will automatically
generate a drop-down list for materials in your inventory whose name matches
what you have typed so far. When you
see the material you want to add, then click on that material in the drop-down
list. Then enter the quantity of the
material you want to use. Keep in mind
that only the materials you entered into EZM Web so far for equipment
maintenance are available to be entered here.
(See section 2.1.4 Materials
for Equipment Maintenance for how to enter materials for equipment
maintenance into EZM Web.)
Once you have entered the material and the quantity, then
click on the SAVE button to add the material to the maintenance
type. You may add as many materials as
necessary to specify all of the materials needed in the maintenance.
You can also edit an material that you’ve already entered:
you can change both the material and the quantity used. To do this, locate the material in the list
which you want to edit and then look to the right of it until you encounter
a ![]() button under the Edit column. Once you click on the edit button, the information about the
material you’re editing will appear in the Add/Edit Material box:
button under the Edit column. Once you click on the edit button, the information about the
material you’re editing will appear in the Add/Edit Material box:
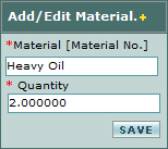
Fig 2.84 – Editing a material in the “Add/Edit Material”
box
In the Add/Edit Material box, edit any of the
information you wish, and then click on the SAVE button. The material will be updated with the new
information.
To delete
a material from the maintenance type, locate the material in the list and then
look to the right of it until you encounter a
![]() button under the Delete column. Click on the
button under the Delete column. Click on the ![]() button. The material to
the left of the delete button you clicked will be deleted from the list.
button. The material to
the left of the delete button you clicked will be deleted from the list.
Specifying the Replacement Parts Used in the
Maintenance
For each
maintenance type in a maintenance profile, you can specify the parts to be
inspected and possibly replaced in the maintenance. However, unlike materials that are automatically deducted from
inventory when the work order is completed, replacement parts are only deducted
from inventory if the parts actually needed to be replaced during the
maintenance following an inspection. It
is common, for example, to combine a replacement part with an operation that
specifies that the existing part be inspected and replaced if damaged.
To begin
adding replacement parts to a maintenance type, first look in the lower left
corner of the screen for a box that has three options: MATERIALS,
OPERATIONS, and PARTS TO MAINTAIN:
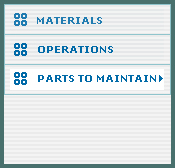
Fig 2.85 - Box with “MATERIALS”, “OPERATIONS”, and “PARTS
TO MAINTAIN” options
Click on PARTS TO MAINTAIN. Once you have clicked there, a list of all
of the replacement parts in the maintenance type will display to the right (or
will be empty if you haven’t entered any parts yet):

Fig 2.85 – List of Replacement Parts
For each
part in the list, its unique identification number is shown (Part No.),
the material name is shown (Part Description), and the quantity to be
replaced (if necessary) is shown as well (Qty.).
To add a
new replacement part, use the Add/Edit Part box to the right to
add a new part to the list:
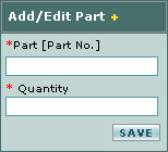
Fig 2.86 – “Add/Edit Part” box used to add a new
replacement part to a maintenance type
First, enter the name of the replacement part you want to
add. Do this by clicking in the Part
box and typing in the name. EZM Web
will automatically generate a drop-down list for replacement parts in your
inventory whose name matches what you have typed so far. When you see the part you want to add, then
click on that part in the drop-down list.
Then enter the quantity of the part you would need to replace in the
instance of a part failure or failed inspection. Keep in mind that only the parts you entered into EZM Web so far
for equipment maintenance are available to be entered here. (See section 2.1.5 Parts for Equipment Maintenance for
how to enter parts for equipment maintenance into EZM Web.)
Once you have entered the part and the quantity, then
click on the SAVE button to add the part to the maintenance type. You may add as many replacement parts as
necessary to specify all of the parts that need to be inspected and/or replaced
during the maintenance.
You can also edit a replacement part that you’ve already
entered: you can change both the part and the quantity. To do this, locate the part in the list
which you want to edit and then look to the right of it until you encounter
a ![]() button under the Edit column. Once you click on the edit button, the information about the
material you’re editing will appear in the Add/Edit Part box:
button under the Edit column. Once you click on the edit button, the information about the
material you’re editing will appear in the Add/Edit Part box:
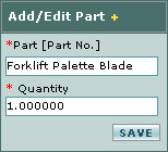
Fig 2.87 – Editing a replacement part in the “Add/Edit
Part” box
In the Add/Edit Part box, edit any of the
information you wish, and then click on the SAVE button. The part will be updated with the new
information.
To delete
a replacement part from the maintenance type, locate the part in the list and
then look to the right of it until you encounter a ![]() button under the Delete column. Click on the
button under the Delete column. Click on the ![]() button. The part to the
left of the delete button you clicked will be deleted from the list.
button. The part to the
left of the delete button you clicked will be deleted from the list.
Reports Available on the Equipment Maintenance
Profile Screen
There are
four reports that you can print from the equipment maintenance profile screen:
·
A report that shows all of the equipment maintenance
profiles that have been entered into EZM Web so far.
·
A report that shows all of the materials in all of your
equipment maintenance profiles.
·
A report that shows all of the operations in all of your
equipment maintenance profiles.
·
A report that shows all of the replacement parts in all of
your equipment maintenance profiles.
To print
any of these reports, first locate the Reports box at the lower-right
corner of the screen:
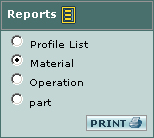
Fig 2.88 – The “Reports” box showing reports that can be
printed
Then click on one of the small circles next to Profile
List, Material, Operation, or Part to select the
report you want to print, and then click on the PRINT button. For example, here is the report that
displays all of the equipment maintenance profiles currently entered into EZM
Web:
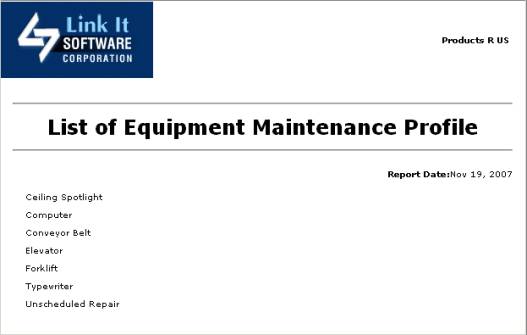
Fig 2.89 – Report showing list of all equipment
maintenance profiles