Contents:
- 3.5: Work Orders for Vehicle Maintenance
- 3.5.1: Viewing Vehicle Maintenance
Events
- 3.5.2: Creating Vehicle Work Orders
- 3.5.3: Editing and Closing Work Orders
- 3.5.4: Assigning Work Orders
- 3.5.5: Using the Vehicle Maintenance
Calendar
- 3.5.6: Using the Advanced Search
Feature
3.5 Work Orders for Vehicle
Maintenance
|
|
EZM Web allows you to issue
vehicle work orders for both routine and emergency maintenance and view
maintenance events for vehicles sorted either by vehicle, by the date on which
they are due, or by the usage at which they are due. The main part of EZM Web from which you issue vehicle work orders
is accessed by clicking on Service Due under the Vehicle Service drop-down
list on the left side of the screen:
![]()
3_104: Fig 3.136 – “Service Due” link
After you click on Service
Due, you will be taken to the following screen, where you will see a list
of all of the vehicles you’ve entered into EZM Web so far:
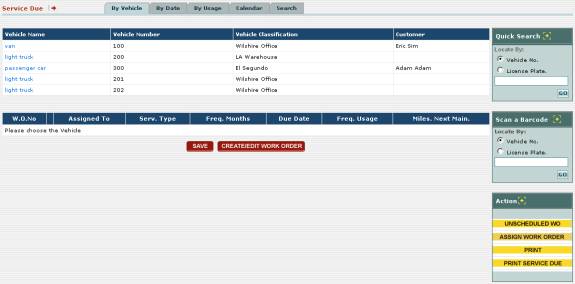
3_105: Fig 3.137 – “Service Due” section of EZM Web
This screen shows a list of all of the vehicles you’ve
entered so far because here you can view maintenance events sorted by
vehicle. Here you can select a vehicle
and view the maintenance events for it and, if you wish, create a work order
for a scheduled maintenance event or for an unscheduled emergency
maintenance. In the following sections
this guide will explain how to view maintenance events for vehicles and how to
create work orders for vehicle maintenance.
3.5.1 Viewing Vehicle Maintenance Events
As mentioned earlier in this guide, there are three ways
to view maintenance events for vehicles: sorted either by vehicle, by the date
on which it’s due, or by the usage at which it is due.
Viewing Vehicle
Maintenance Events Sorted by Vehicle
To view vehicle maintenance
events sorted by vehicle, first you need to go to the section of EZM Web where
you view vehicle maintenance (see section 3.5
Work Orders for Vehicle Maintenance for how to get here). Click on the By Vehicle tab (the
leftmost tab) at the top of the screen.
This will take you to the following screen where you can see the
maintenance events sorted by vehicle:

3_105: Fig 3.138 – Screen where you view vehicle
maintenance events sorted by vehicle
Notice that there is a list of
all the vehicles you have entered into EZM Web so far:

3_106: Fig 3.139 – List of vehicles currently entered into
EZM Web
To see the list of maintenance
events for a vehicle, you must first select a vehicle by clicking on its
vehicle name in the left most column of this list called Vehicle Name. The vehicle name is shown in blue text. Use the vehicle number in the Vehicle
Number column to identify which vehicle you are selecting; the vehicle
number uniquely identifies each vehicle within EZM Web. Once you have selected a vehicle by clicking
on its vehicle name, all of the maintenance events for that vehicle will be
shown below:

3_107: Fig 3.140 – List of maintenance events for a
particular vehicle
For each maintenance event, you
can see the following information:
o
W.O.No: If a work order has been
created for a maintenance event, the work order number will show in this
column. Each work order number uniquely
identifies a particular work order.
o
Assigned To: If a work order has been
created, this is the person to whom the work order is assigned. Later, in section 3.5.4 Assigning Work Orders this guide will show how to assign work orders.
o
Serv. Type: This is the type of
maintenance which is maintenance event is for.
Each service type prescribes a given set of services to be performed on
at a frequency (in months and/or in usage miles) specified by the user. Each service in turn specifies a set of
operations required to complete the service as well as the materials and
replacement parts needed. See sections 3.1.3 Service Types and 3.1.8 Vehicle Service Profiles for
more information.
o
Freq. Months: This is the frequency at
which this maintenance event is performed, in months.
o
Due Date: This is the date on which the
maintenance event is due.
o
Freq. Usage: This is the frequency at
which this maintenance event is performed, in usage miles.
o
Miles Next Main.: This is
the amount of usage miles remaining before the maintenance event will become
due.
You can also jump to the
maintenance events for a specific vehicle if you know its unique vehicle number
or its license plate number, or if that vehicle has a barcode which you have
printed for it (see section 3.4 Printing Vehicle Barcode Labels for
more information on how to print vehicle barcodes).
On the right side of the screen
is a Quick Search box which you can use to jump to the maintenance for a
specific vehicle if you know its vehicle number or its license plate number:
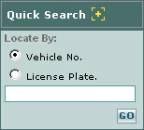
3_108: Fig 3.141 – “Quick Search” box to locate vehicle
maintenance by Vehicle No. or License Plate.
To search by vehicle number or
manufacturer serial number, first click on one of the circles labeled Vehicle
No. or License Plate. to search by vehicle number or license place
number respectively. Then, depending on
what you just selected, type the vehicle number or license plate number of the
vehicle in the box immediately below and click on the small GO
button. All of the maintenance events
for the vehicle which you specified will be shown.
You can also jump to the
maintenance events for a specific vehicle by scanning a barcode. This is done using the Scan a Barcode
box which is also on the right side of the screen:
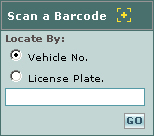
3_109: Fig 3.142 – “Scan a Barcode” box used to locate
maintenance events for a vehicle
To search by scanning a barcode,
first you will need to select whether the barcode you are scanning contains a
vehicle number or a license plate number: to do this, click on one of the
circles labeled Vehicle No. or License Plate.. Then click in the box immediately below and
swipe the barcode with your scanner, and then click on the small GO
button. All of the maintenance events
for the vehicle which you scanned will be shown.
3.5.2 Creating Vehicle Work Orders
EZM Web allows you to create
work orders for both routine scheduled maintenance events and for unscheduled
repairs, such as in the event of an unexpected vehicle breakdown. First, we will describe how to create a work
order for a routine scheduled maintenance event.
Creating
Scheduled Vehicle Work Orders
To create a work order for a
routine scheduled maintenance event, first you need to view maintenance events
either by vehicle, by date, or by usage.
In this discussion, we will show how to create a scheduled work order while
viewing maintenance by vehicle. (See
section 3.5.1 Viewing Vehicle
Maintenance Events for how to view maintenance sorted by vehicle, as
well as by date or by usage.)

3_105: Fig 3.143 – Viewing maintenance events by vehicle
Once you are at the screen where
you view maintenance events by vehicle, select a vehicle by clicking on its
vehicle name in the left most column of this list called Vehicle Name. The vehicle name is shown in blue text. Use the vehicle number in the Vehicle
Number column to identify which vehicle you are selecting; the vehicle
number uniquely identifies each vehicle within EZM Web. Once you have selected a vehicle by clicking
on its vehicle name, all of the maintenance events for that vehicle will be
shown below:

3_107: Fig 3.144 – List of maintenance events for a
particular vehicle
Any maintenance events for which
you have already created a work order have the work order number listed in the W.O.No
column—which is the leftmost column—in the list of maintenance events. Conversely, a maintenance event for which a
work order has not been created will not have a work order number. To create a new work order for a maintenance
event, first select the maintenance event for which you want to create a work
order by clicking in one of the circles in the column immediately to the right
of the W.O.No column. Then click
on the CREATE/EDIT WORK ORDER button, which will open up the following
screen:
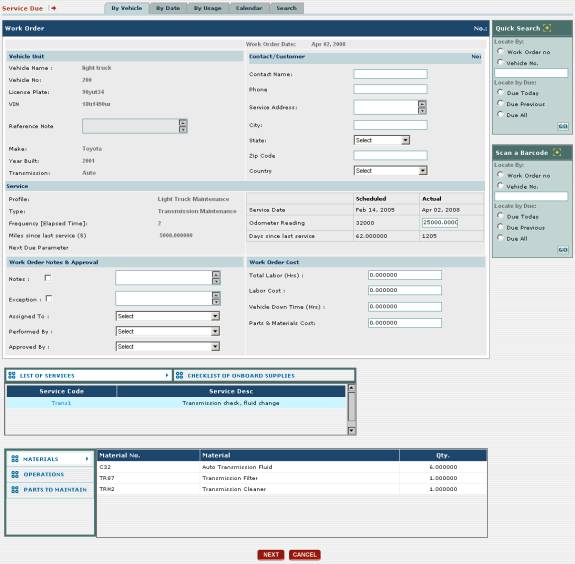
3_110: Fig 3.145 – List of maintenance events for a
particular vehicle
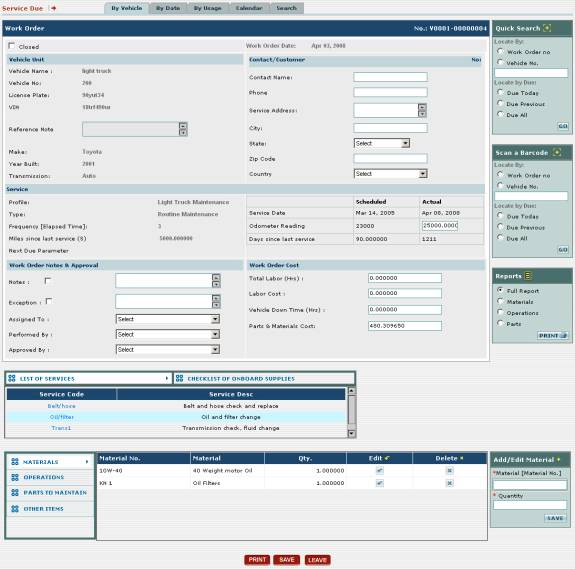
This is the screen at which you
create a work order. As you can see,
there are many data items on this screen, some of which are automatically
filled in and some of which you have to provide data for. The work order screen is divided into
several sections, which we will cover in order, going from top to bottom.
The first data area on the work
order screen is the Vehicle Unit data area. This data area displays some basic properties of the vehicle for
which you are creating the work order and are all filled in automatically with
the information you provided when you entered the vehicle into EZM Web:
o
Vehicle Name: Here the vehicle name,
which specifies the type of vehicle, of the vehicle for which you are creating
the work order is displayed. See
section 3.1.1 Vehicle Names for more information on vehicle names.
o
Vehicle No: Here the vehicle number
which you have chosen to uniquely identify the vehicle within EZM Web is
displayed. The vehicle number may or
may not correspond with your own internal cataloguing system you use for
identifying your vehicles.
o
License Plate: Here the license plate
for the vehicle for which you are creating a work order is displayed.
o
VIN: Here the vehicle’s VIN number
is displayed.
o
Reference Note: Here
any extra information that doesn’t fall under any of the other data areas is
noted. The vehicle reference notes are
entered when the vehicle is created in EZM Web. See section 3.2.2
Entering a New Vehicle or 3.2.3
Editing a Vehicle for further information on entering notes on vehicles
or other data items.
o
Model: This is the make of the
vehicle.
o
Year Built: This is the year in
which the vehicle was built.
o
Transmission: This is the type of
transmission the vehicle has.
The next data area on the work
order is the Contact / Customer area.
If the vehicle for which you are creating the work order belongs to a
customer for whom you are performing maintenance, the name of the customer will
automatically be filled in here as well as their phone number, address, city,
state, zip code, and the country in which they are located.
The next data area on the work
order screen is the Service data area.
This shows some properties about what kind of maintenance the vehicle
requires and what particular maintenance is being performed is the work order
you are creating:
o
Profile: This is the service profile
for the vehicle for which you are creating the work order. The service profile is a complete description
of the maintenance for a vehicle. See
section 3.1.8 Vehicle Service Profiles
for full information on service profiles.
o
Type: This is the type of
maintenance that is being performed.
o
Frequency [Elapsed Time]: This is
the frequency at which this service type is performed, in months.
o
Miles since last service (S): This is
the amount of usage miles that have been logged since the last time the vehicle
received the service type which this work order is for.
To the right of these four data
items there is a small chart showing the difference between when the
maintenance was scheduled and when the maintenance is actually being
performed. The Service Date, Odometer
Reading, and Days since last service where the vehicle is actually
scheduled for maintenance are all shown along with the actual points when the
work is being done. The actual Odometer
Reading is simply filled in with the current mileage for the vehicle as
recorded in EZM Web. If the actual
mileage for the vehicle differs from what is shown here (in other words, there
are miles that have not been logged yet), you can click in the Actual
Odometer Reading box and type in the current mileage. A usage log entry for that vehicle will
automatically be created that is the difference between what has already been
recorded in EZM Web and what you entered into the Actual Odometer Reading
box.
The next data area on the work
order screen is Work Order Notes & Approval:
o
Notes: This is where you enter any
additional notes about this maintenance.
The checkbox to the left of the box where you type the notes will
automatically be checked to indicate that you have entered some notes.
o
Exception: This is where you
indicate that there are changes made to what is usually prescribed in this
maintenance. The checkbox next to the
field in which you type exceptions will be automatically checked to indicate
that there are exceptions for this work order.
o
Assigned To: This is where you select
the person to whom the responsibility for performing this work is
assigned. Select the person to whom you
want to assign the work from the drop-down list.
o
Performed By: This is where the person
who actually performs the work is selected.
Select the person who is actually performing the work from the drop-down
list.
o
Approved By: This is
where you indicate the person who reviewed the work upon completion. Select the person who reviewed the work from
the drop-down list.
The next data area on the work
order screen is Work Order Cost.
This is where you enter the costs associated with performing the work
prescribed in the work order:
o
Total Labor (Hrs): This is
the total amount of hours spent performing the labor prescribed in the work
order.
o
Labor Cost: This is the total cost
for the labor.
o
Vehicle Down Time (Hrs): This is
the total amount of hours that the vehicle was down for repairs.
o
Parts & Materials Cost: This is
the total cost of the parts and materials used in the maintenance. The amount in this field is automatically
calculated from the materials used in the maintenance and the parts you have
chosen to replace.
Lastly, at the bottom of the
work order screen, you can view the operations performed and the materials and
replacement parts used in each service included in the work order as well as a
checklist of onboard supplied needed in the work order. First, to see what operations, materials,
and parts are included in a service, you must select the service from the LIST
OF SERVICES:

3_111: Fig 3.146 – List of services included in the work order
In the list of services, the Service
Code for each service is listed along with a short description of the
service under the Service Desc column.
To see the operations, materials, and parts for a service, click on that
service’s code, shown in blue text, under the Service Code column. Once you have clicked on the service code,
then you can view the operations, materials, and parts for that service. Look in the lower left corner of the screen
for a box that has three options: MATERIALS, OPERATIONS, and PARTS
TO MAINTAIN:
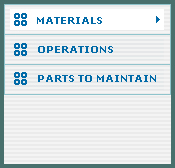
3_112: Fig 3.147 – Box where you select whether you wan to
view materials, operations, or parts in a service
Click on MATERIALS, OPERATIONS,
or PARTS TO MAINTAIN in the box at the bottom left corner of the work
order screen. Depending on what you
clicked, the materials, operations, and parts to maintain will then show to the
right of that box:

3_113: Fig 3.148 – Viewing the materials included in a
service
You can also view the checklist
of onboard supplies by clicking on CHECKLIST OF ONBOARD SUPPLIES above
the list of services.
Once you save the work order,
you can edit the materials, operations, and parts to maintain for each service
included in the work order. Once you
have reviewed all of the information in the work order and want to save it,
click on the NEXT button at the bottom of the work order screen to save
the work order, or you can click on the CANCEL button if you have
changed your mind and no longer want to create the work order. After clicking on the SAVE & NEXT
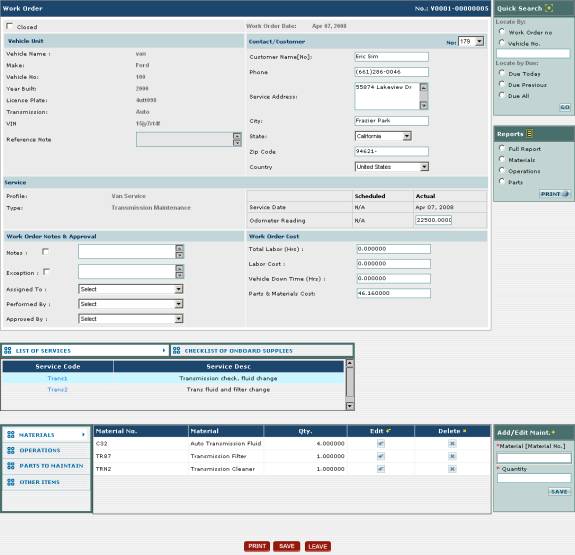
button, the work order will be created and you will see the following screen:

3_114: Fig 3.149 – Work order screen after saving work
order
This screen is similar to the one earlier, except that you
can do a few more things: you can print the work order, you can also change the
materials, operations, and parts to maintain in each service, and you can also
add other ad hoc items you want to use in the maintenance.
There are two ways you can print
the work order: you can click on the PRINT button at the bottom of the
screen, or you can use the Reports box at the right side of the screen:
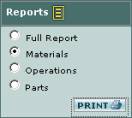
3_115: Fig 3.150 – Box where you select what type of work
order you want to print
To print the full work order using the Reports box,
begin by clicking on the circle called Full Report to select it. Then click on the small PRINT button
in the lower right corner of the box.
After selecting your printer, the work order will print:
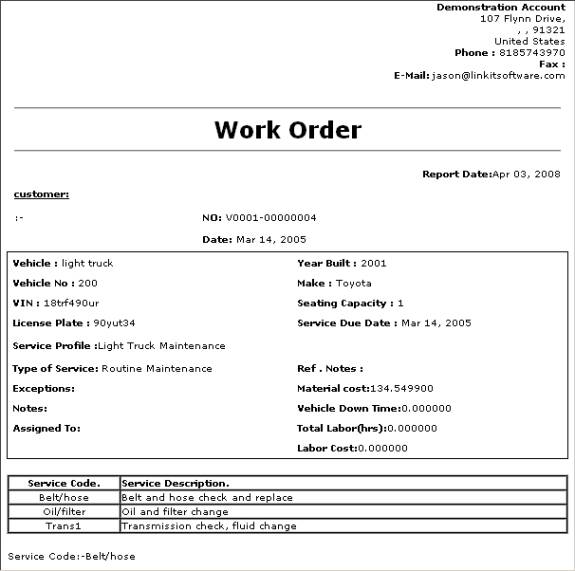
3_116: Fig 3.151 – Work order printout
When you select Full Report, the work order that
prints out contains all of the Materials, Operations, and Parts, and
other items included in each service in the work order You can also use the Reports box to
print a work order that only contains the Materials, Operations, or Parts
required in each service in the work order.
To do this, select one of the circles called Materials, Operations,
or Parts in the Reports box, and then click on the PRINT
button at the lower right.
Lastly, you can choose the materials, operations, parts to
maintain, and other items that are to be included in each service in the work
order. First, to change what
operations, materials, and parts are included in a service, you must select the
service from the LIST OF SERVICES:

3_188: Fig 3.152 – List of services
To change the operations, materials, and parts for a
service, click on that service’s code, shown in blue text, under the Service
Code column. Once you have clicked
on the service code, then you can view and change the operations, materials,
and parts for that service. Look in the
lower left corner of the screen for a box that has three options: MATERIALS,
OPERATIONS, PARTS TO MAINTAIN and OTHER ITEMS:
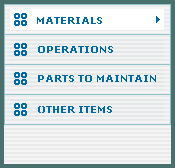
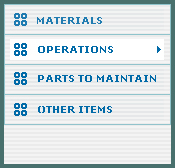
3_117: Fig 3.153 – Box where you select whether you want
to edit materials, operations, parts, or other items
Click on MATERIALS. Once you have clicked there, a list of all of the materials in
the service you selected will display to the right (or will be empty if you
haven’t entered any materials yet):
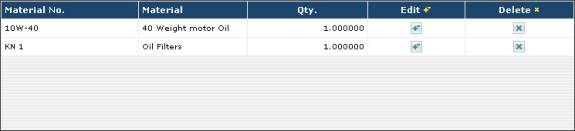
3_118: Fig 3.153 – List of materials
For each material in the list,
its unique identification number is shown (Material No.), the material
name is shown (Material), and the quantity used in the maintenance is
shown (Qty.). To add a new
material, use the Add/Edit Material box to the right to add a new
material to the list:
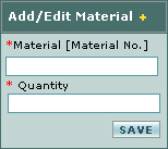
3_119: Fig 3.154 – “Add/Edit Material” box used to add a
new material to a service
First, enter the name of the material you want to add. Do
this by clicking in the Material box and typing in the name. EZM Web will automatically generate a
drop-down list for materials in your inventory whose name matches what you have
typed so far. When you see the material
you want to add, then click on that material in the drop-down list. Then enter the quantity of the material you
want to use. Keep in mind that only the
materials you entered into EZM Web so far for vehicle maintenance are available
to be entered here. (See section 3.1.4 Materials for Vehicle Maintenance for
how to enter materials for vehicle maintenance into EZM Web.) Once you have entered the material and the
quantity, then click on the SAVE button to add the material to the work
order.
You can also edit a material that you’ve already entered:
you can change both the material and the quantity used. To do this, locate the material in the list
which you want to edit and then look to the right of it until you encounter
a ![]() button under the Edit column. Once you click on the edit button, the information about the
material you’re editing will appear in the Add/Edit Material box:
button under the Edit column. Once you click on the edit button, the information about the
material you’re editing will appear in the Add/Edit Material box:
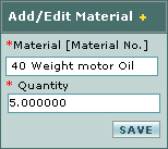
3_120: Fig 3.155 – Editing a material in the “Add/Edit
Material” box
In the Add/Edit Material box, edit any of the
information you wish, and then click on the SAVE button. The material will be updated with the new
information.
To delete a material from the
service, locate the material in the list and then look to the right of it until
you encounter a ![]() button under the Delete column. Click on the
button under the Delete column. Click on the ![]() button. The material to
the left of the delete button you clicked will be deleted from the list.
button. The material to
the left of the delete button you clicked will be deleted from the list.
You can also change the operations performed in the
service. To do this, first look in the
lower left corner of the screen for the box with four options: MATERIALS,
OPERATIONS, PARTS TO MAINTAIN, and OTHER ITEMS:
3_121: Fig 3.156 – Box where you select whether you want
to edit materials, operations, parts, or other items
Click on OPERATIONS. Once you have clicked there, a list of all of the operations in
the service will display to the right (or will be empty if you haven’t entered
any operations yet):
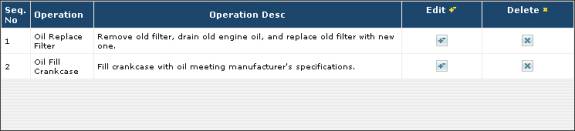
3_122: Fig 3.157 – List of operations
For each operation in the list, the sequence/step no. is
shown (Seq. No.), the operation name is shown (Operation), and a
detailed description of the operation (Operation Desc).
To add a new operation, use the Add/Edit Operation
box to the right to add a new operation to the list:

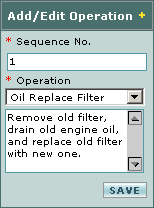
3_123: Fig 3.158 – “Add/Edit Operations” box used to add a
new operation to a service
First, enter the step no. of the operation: in other words,
if it’s the 1st, 2nd, 4th step, etc. Do this by clicking in the Sequence No.
box and typing in a number. Then select
the operation you want to add from the Operation drop-down box. Keep in mind that only the operations you
entered into EZM Web so far for vehicle maintenance are available to be entered
here. (See section 3.1.7 Vehicle Maintenance Operations for
how to enter vehicle maintenance operations into EZM Web.) Once you have entered the sequence number and
selected the operation, then click on the SAVE button to add the
operation to the service.
You can also edit an operation that you’ve already
entered: you can change the sequence number, the operation description, or the
operation itself. To do this, locate
the operation in the list which you want to edit and then look to the right of
it until you encounter a ![]() button under the Edit column. Once you click on the edit button, the information about the
operation you’re editing will appear in the Add/Edit Operations box:
button under the Edit column. Once you click on the edit button, the information about the
operation you’re editing will appear in the Add/Edit Operations box:
3_124: Fig 3.159 – Editing an operation in the “Add/Edit
Operations” box
In the Add/Edit Operations box, edit any of the
information you wish, and then click on the SAVE button. The operation will be updated with the new
information.
To delete a operation from the service, locate the
operation in the list and then look to the right of it until you encounter
a ![]() button under the Delete column. Click on the
button under the Delete column. Click on the ![]() button. The operation to
the left of the delete button you clicked will be deleted from the list.
button. The operation to
the left of the delete button you clicked will be deleted from the list.
You can also change the
replacement parts used in the service.
Unlike materials that are automatically deducted from inventory when the
work order is completed, replacement parts are only deducted from inventory if
the parts actually needed to be replaced during the maintenance following an
inspection. It is common in a service,
for example, to combine a replacement part with an operation that specifies
that the existing part be inspected and replaced if damaged.
To change the replacement parts
in the service, first look in the lower left corner of the screen for a box
that has four options: MATERIALS, OPERATIONS, PARTS TO
MAINTAIN, and OTHER ITEMS:
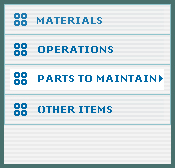
3_125: Fig 3.160 - Box where you select whether you want
to edit materials, operations, parts, or other items
Click on PARTS TO MAINTAIN. Once you have clicked there, a list of all
of the replacement parts in the service will display to the right (or will be
empty if you haven’t entered any parts yet):
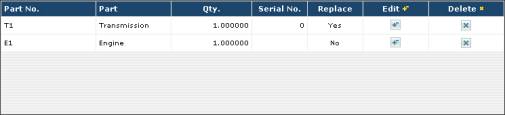
3_126: Fig 3.161 – List of Replacement Parts
For each part in the list, its
unique identification number is shown (Part No.), the part name is shown
(Part), the quantity to be replaced (if necessary) is shown (Qty.),
and the serial number is shown (Serial No.).
To add a new replacement part,
use the Add/Edit Part box to the right to add a new part to the
list:
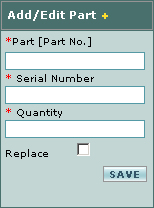
3_127: Fig 3.162 – “Add/Edit Part” box used to add a new
replacement part to a service
First, enter the name of the replacement part you want to
add. Do this by clicking in the Part
box and typing in the name. EZM Web
will automatically generate a drop-down list for replacement parts in your
inventory whose name matches what you have typed so far. When you see the part you want to add, then
click on that part in the drop-down list.
Then enter the quantity of the part you would need to replace in the
instance of a part failure or failed inspection. Then enter the serial number of the part you are inspecting and
possibly replacing in the Serial Number box. Keep in mind that only the parts you entered into EZM Web so far
for vehicle maintenance are available to be entered here. (See section 3.1.5 Replacement Parts for Vehicle
Maintenance for how to enter parts for vehicle maintenance into EZM
Web.) Once you have entered the part,
the serial number, and the quantity, then click on the SAVE button to
add the part to the service.
You can also edit a replacement part that you’ve already
entered: you can change both the part and the quantity. To do this, locate the part in the list
which you want to edit and then look to the right of it until you encounter
a ![]() button under the Edit column. Once you click on the edit button, the information about the
material you’re editing will appear in the Add/Edit Part box:
button under the Edit column. Once you click on the edit button, the information about the
material you’re editing will appear in the Add/Edit Part box:
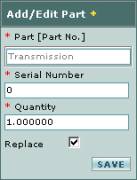
3_128: Fig 3.163 – Editing a replacement part in the
“Add/Edit Part” box
In the Add/Edit Part box, edit any of the
information you wish, and then click on the SAVE button. The part will be updated with the new
information.
To delete a part from the
service, locate the part in the list and then look to the right of it until you
encounter a ![]() button under the Delete column. Click on the
button under the Delete column. Click on the ![]() button. The part to the
left of the delete button you clicked will be deleted from the list.
button. The part to the
left of the delete button you clicked will be deleted from the list.
Lastly, you can add other ad hoc
items to the service that aren’t already listed in your inventory. To do this, first look in the lower left
corner of the screen for the box that has four options: MATERIALS,
OPERATIONS, PARTS TO MAINTAIN, and OTHER ITEMS:
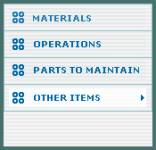
3_129: Fig 3.164 - Box where you select whether you want
to edit materials, operations, parts, or other items
Click on OTHER ITEMS. Once you have clicked there, a list of all
of the other items in the work order will display to the right (or will be
empty if you haven’t entered anything yet):
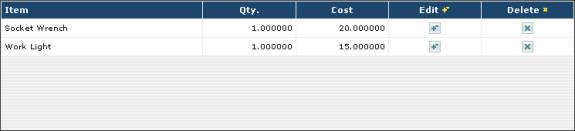
3_130: Fig 3.165 – List of other items
For each item in the list, the
name of the item is shown (Item), the quantity is shown (Qty.),
and the cost of the item is shown (Cost).
To add a new other item, use the
Add/Edit Other Item box to the right to add a new item to the
list:
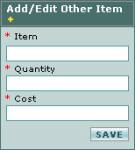
3_131: Fig 3.166 – Adding an other item to the work order
First, enter the name of the
item you want to add in the Item box.
Then enter the quantity of that item you are going to use in the Quantity
field. Then enter the total cost of the
item or items into the Cost field; the cost which you enter here will
automatically be added to the Parts & Materials Cost on the work
order. Once you have entered all of
this information, click on the SAVE button to the lower right to add the
item to the work order.
You can also edit an item that
you’ve already entered: you can change the name of the item, the quantity, and
the cost. To do this, locate the item
in the list which you want to edit and then look to the right of it until you
encounter a ![]() button under the Edit column. Once you click on the edit button, the information about the item
you’re editing will appear in the Add/Edit Other Item box:
button under the Edit column. Once you click on the edit button, the information about the item
you’re editing will appear in the Add/Edit Other Item box:
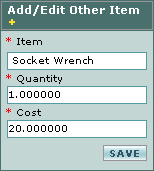
3_132: Fig 3.167 – Editing an other item
In the Add/Edit Other Item
box, edit any of the information you wish, and then click on the SAVE
button. The item will be updated with
the new information.
To delete an item from the
service, locate the item in the list and then look to the right of it until you
encounter a ![]() button under the Delete column. Click on the
button under the Delete column. Click on the ![]() button. The item to the
left of the delete button you clicked will be deleted from the list.
button. The item to the
left of the delete button you clicked will be deleted from the list.
Once you have finished entering
all of the information in the work order, click on the SAVE button at
the bottom of the screen to save it.
Creating
Unscheduled Vehicle Work Orders
Creating unscheduled work orders
for vehicle maintenance In EZM Web is similar to creating scheduled work
orders. To create a work order for an
unscheduled maintenance event for a vehicle, first you need to view vehicle
maintenance events either by vehicle, by date, or by usage. In this discussion, we will show how to
create an unscheduled work order while viewing maintenance by vehicle. (See section 3.5.1 Viewing Vehicle Maintenance Events
for how to view maintenance by vehicle, as well as by date or by usage.)
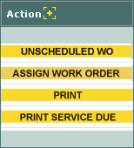
Once you are at the screen where
you view maintenance events by vehicle, notice that there is an UNSCHEDULED
WO button at the lower right corner of the screen:
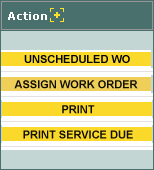
3_133: Fig 3.168 – Editing an other item
Click on the UNSCHEDULED WO
button. You will be taken to the
following screen:
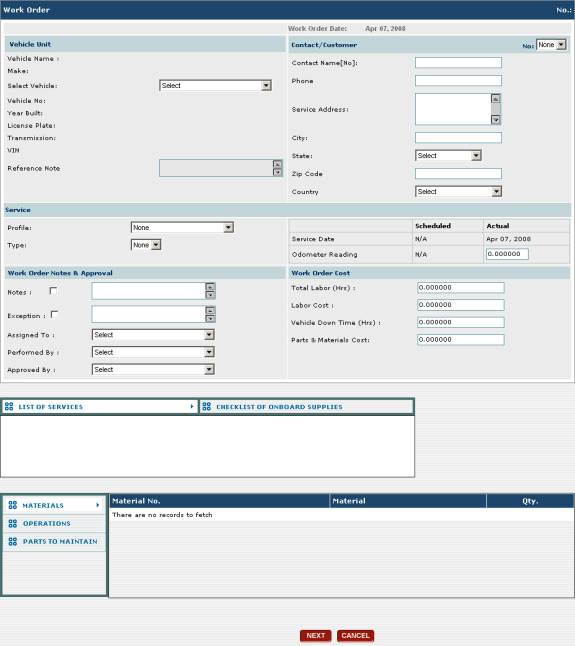
3_134: Fig 3.169 – Screen at which you create an unscheduled
work order
This screen is very similar to
the one at which you create a scheduled work order. The two main differences are that:
1.
You need to select the vehicle for which you are creating
the unscheduled work order here.
2.
You need to select the service profile and service type in
order to specify what kind of maintenance you want to perform.
To select the vehicle for which
you want to create the work order use the Select Vehicle drop-down
selection box at the upper left corner of the screen. Once you select the vehicle, all of the details for it will be
automatically filled in:
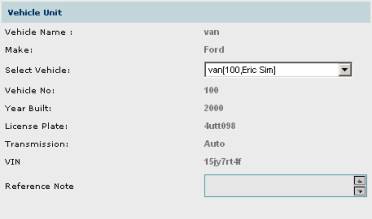
3_135: Fig 3.170 – Vehicle information on unscheduled work
order screen
If you are maintaining the
vehicle you selected for a customer, that customer’s details will automatically
be shown in the Contact / Customer data area to the right.
After selecting the vehicle for
which you are creating the unscheduled work order, then you need to select the
type of maintenance you want to perform using the Profile and Type
drop-down selection boxes:
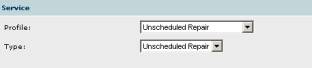
3_136: Fig 3.171 – Selecting maintenance profile and
service type
You can select whichever service
profile and service type which has the maintenance you want to perform. (See sections 3.1.3 Service Types and 3.1.7 Vehicle
Service Profiles). In many
cases, however, there is no existing service profile and service type that
contains the maintenance that addresses the particular breakdown you’ve
experienced. Because of this, you may
want to create a “blank” service profile, service type, and service with no
materials, operations, or replacement parts in it; you would typically call all
three of these something like “Unscheduled Repair” (as shown in figure 3.71 above).
This “blank” service profile, service type and service are then selected
when you want to create an unscheduled work order. You would then add any materials, operations, and replacement
parts to the “Unscheduled Repair” service which you need at the time of the
creation of the work order.
After you have selected the
vehicle and the type of maintenance you want to perform, then click on the NEXT
button at the bottom of the screen, or click on the CANCEL button if you
have changed your mind and no longer want to create the unscheduled work
order. After clicking the NEXT
button, the work order will be saved, and you will be taken to the following
screen:
3_137: Fig 3.172 – Work order screen (changing materials,
parts, operations, and other items for each service)
Just as when you create a
scheduled work order, at this screen you can change the materials, operations,
and replacement parts as well as add other ad hoc items to the work order. If you chose a “blank” service profile and
service type that doesn’t contain any materials, operations, or replacement
parts, then you can add them here. You
may also use the PRINT button and Reports box at the right side
of the screen to print the work order.
Click on the SAVE button at the bottom of the screen to save the
work order.
3.5.3 Editing and Closing
Vehicle Work Orders
Once you have created a vehicle
work order in EZM Web, you may want to make some changes to it. Additionally, you will want to close it when
the work has been completed. In this
section, we will demonstrate how to both edit a vehicle work order and close
it.
Editing
a Vehicle Work Order
To edit a vehicle work order,
first you need to view maintenance events either by vehicle, by date, or by
usage. In this discussion, we will show
how to edit a work order while viewing maintenance by vehicle. (See section 3.5.1 Viewing Vehicle Maintenance Events
for how to view maintenance by vehicle, as well as by date or by usage.)

3_138: Fig 3.173 – Viewing Maintenance Due by Vehicle
As explained in section 3.5.1 Viewing Vehicle Maintenance Events,
you view the maintenance events for each vehicle by clicking on that vehicle in
the list. Then a list of all of the
maintenance events for the vehicle you selected will appear below:

3_139: Fig 3.174 – List of maintenance events for a
vehicle
Each maintenance event for which
a work order has been created has a work order number in the W.O.No
column. If no work order has been
created for a maintenance event, no work order number is shown for it.
To edit an existing work order,
first locate that work order in the list of maintenance events. Then look immediately to the right of the W.O.No
column for a column that contains small circles. Click on the circle that corresponds to the work order you want
to edit, and then click on the CREATE/EDIT WORK ORDER button below the
list of maintenance events. After
clicking on the CREATE/EDIT WORK ORDER button, you will be taken to the
following screen where you can edit the work order:
3_140: Fig 3.175 – Screen where you edit a work order
At this screen you can change
the details of the work order as well as print the work order. See section 3.5.2 Creating Vehicle Work Orders
for information on the meaning of the different data items on this screen as
well as how to change them.
Once you have finished making
your changes to the work order, then click on the SAVE button at the
bottom of the screen. If you have
changed your mind and do not want to make any changes to the work order, then
click on the CANCEL button instead.
Closing
a Work Order
To close a work order, follow
the procedure explained earlier in this section for how to get to the screen
where you edit a work order. Then
locate the Closed checkbox at the upper left corner of the screen:
![]()
3_141: Fig 3.176 – Closed checkbox for closing a work
order
Click in the checkbox to mark
it, and then click on the SAVE button at the bottom of the work order
screen. The work order will then be
closed and go into the vehicle maintenance history for EZM Web. Later, in section 3.6 Vehicle Maintenance History,
we will discuss how to view the vehicle maintenance history.
3.5.4 Assigning Work Orders
EZM Web also has a feature that
lets you assign multiple vehicle work orders and maintenance events to
personnel quickly. You can use this
feature to see all of the maintenance events for vehicles at a glance and
assign multiple work orders to personnel at a single time.
To use this feature, first you
need to view maintenance events either by vehicle, by date, or by usage. (See section 3.5.1 Viewing Vehicle Maintenance Events
for how to view maintenance by vehicle, as well as by date or by usage.) At the lower right part of the screen, you
will see a button called ASSIGN WORK ORDER:
3_142: Fig 3.177 – “ASSIGN WORK ORDER” button
After clicking on the ASSIGN
WORK ORDER button, you will be taken to the following screen, where you’ll
see a list of all of the maintenance events due for vehicles:
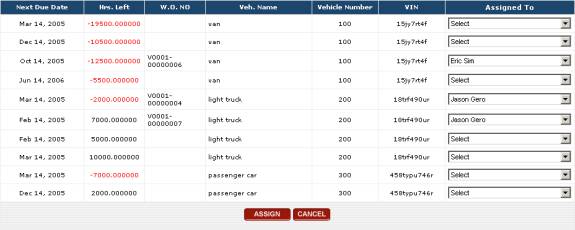
3_143: Fig 3.178 – “ASSIGN WORK ORDER” button
All of the maintenance events
for which a work order has already been created have a work order number in the
W.O. NO column. Those
maintenance events with no work order number have not had a work order number
created for them yet. If you assign
somebody to a maintenance event for which no work order has yet been created, a
work order will be automatically created.
To assign the maintenance events
or an existing work orders, use the drop-down boxes on the right side of the
list under the Assigned To column.
You can assign multiple maintenance events or work orders. Once you have made all of the desired
assignments, then click on the ASSIGN button immediately below the
list. To exit this section of EZM Web
without making any assignments, click on the CANCEL button.
3.5.5 Using the Vehicle
Maintenance Calendar
EZM Web also has a feature that
allows you to see what vehicle maintenance events are due on a given day. To use this feature, first you need to view
maintenance events either by vehicle, by date, or by usage. (See section 3.5.1 Viewing Vehicle Maintenance Events
for how to view maintenance by vehicle, as well as by date or by usage.) Then, click on the Calendar tab. You will be taken to the following screen:
3_144: Fig 3.179 – Maintenance calendar with maintenance
events listed for the selected day
At the right of the screen, you
will see a small calendar:

3_145: Fig 3.180 – Maintenance calendar showing selected
date
To see a list of all of the
maintenance events that are due on a particular day, click on that day in the
calendar. To advance the calendar one
month forward or backwards, use the small arrows at the top right and left
corners of the calendar respectively.
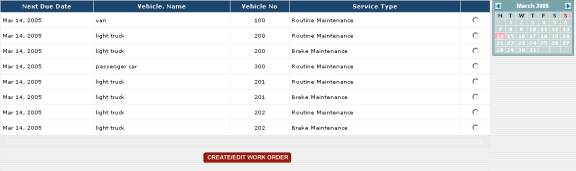
After clicking on a day on the calendar, a list of all of the
maintenance events due on that day will be displayed.

3_146: Fig 3.181 – List of maintenance events for the
selected day
For each maintenance event that
is due, you can see the type of vehicle which the maintenance is for (Vehicle.
Name), the internal control number that uniquely identifies the vehicle for
which the maintenance event is scheduled (Vehicle No), and the type of
the maintenance (Service Type).
To create a work order for one of the maintenance events that is listed
here, click in the circle in the right-most column in the list which
corresponds with the maintenance event to select it. Then click on the CREATE/EDIT WORK ORDER button below the
list. This will open the work order
screen at which you can enter the details about the new work order. (see section 3.5.2 Creating Vehicle Work Orders
for information on how to use this section of EZM Web.)
3.5.6 Using the Advanced Search
Feature
The vehicle service module in
EZM Web includes an advanced search feature that lets you search for maintenance
events based on filtering criteria you enter.
To use this feature, first you need to view maintenance events either by
vehicle, by date, or by usage. (See
section 3.5.1 Viewing Vehicle
Maintenance Events for how to view maintenance by vehicle, as well as
by date or by usage.) Then, click on
the Search tab. You will be
taken to the following screen:
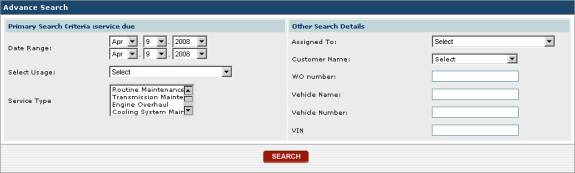
3_147: Fig 3.182 – Advanced search for maintenance events
In this section of EZM Web, you
can enter multiple criteria to search for maintenance events, and any
maintenance events that don’t match the criteria that you entered will be
filtered out leaving only those which match what you entered. The purpose of each data area on the
advanced search form is as follows:
o
Date Range: Here you can select the
date range in which you want to search for maintenance events. Any maintenance events falling outside the
date range you select here will be omitted from your search results. The top set of three boxes let you select
the lower bound of the date range, while the bottom three let you select the
upper bound.
o
Select Usage: Only
maintenance events whose time until due, in usage, which falls within the usage
range you select here will be included in your search results.
o
Service Type: This drop-down box lets
you filter by the type of maintenance.
o
Assigned To: This drop-down box lets
you filter by the person to whom the maintenance is assigned.
o
Customer Name: This drop-down box lets
you filter by the customer for whom you are servicing the vehicle. Only maintenance for vehicles belonging to
the customer you select here will be displayed.
o
WO number: If you want to look for
a particular work order and you know the work order number, type it here.
o
Vehicle Name: This field lets you
filter by the type of vehicle or “vehicle name”. Only the type of vehicle that you enter here will be included in
the search results.
o
Vehicle Number.: If you
want to filter all of the maintenance due for only one specific vehicle and you
know the vehicle number that uniquely identifies it, then you can enter it
here.
o
VIN: If you want to filter all of
the maintenance due for only one specific vehicle and you know the VIN number
that uniquely identifies it, then you can enter it here.
Once you have entered all of
your search criteria, then click on the SEARCH button to display the
list of maintenance events you are searching for.